
This post for today will be similar to the post about photographing ring shots. Today I want to expand upon on the last point of capturing rings or other details in a setting that reflect the couple’s wedding day. I will share how I go about photographing details to tell a cohesive story through the photographs.
1. One a wedding day I begin shooting the details first…wedding dress, shoes, jewelry, rings, perfume, veil, purse and any other items given to me by the bride. Always ask permission to move their image to a new location or if you can take them outside. Knowing the bride and the details she has already shared about her wedding I can get a feel for their style. Upon entering the setting or room I begin thinking where I want to organize and display their items. And let’s not forget about the groom. The same concept goes for him and his items.
2. I am always looking for natural light first, even when shooting indoors. A repeat tip is when shooting indoors; when possible use one source of light. Turn off lights!
3. Next I am looking how to stage their items. I am looking for an element or color or background or texture to help create a story to their wedding day. This element will help create a cohesive look for their wedding images. It could be lace in the wedding dress, veil, bride’s maid dresses, fabric from chair, wood floors…etc. When shooting I begin to think about their wedding album and how images can be paired to one another to tell their wedding story.
4. Once I have found where I want to display the items and how I want to stage them I start to clean up the background. I look through my lens and look for any objects, or colors that might be distracting in the background. I seek to remove them if possible or change my shooting position until the background is clean. This keeps your eyes drawn to the item that is the focus.
Here is one example showing where and how I created images to tell a story of Corrine and John’s wedding. I entered the church where she was getting ready and as I walked into the foyer area there were tall windows letting in diffused light. I immediately made a mental note that this would be an area that I would want to bring her items out as the windows created soft natural light, perfect for details.
Here are some other thoughts that help me decide how to stage Corrine’s details. I noticed burlap was used on her setting chart, and table settings. The color of Corrine’s hand made programs was in kraft paper, similar color to the burlap. They were having their first look and family formal pictures at a local farm. Their wedding experience was more rustic and earthy. I then set out to find a piece of burlap that I could bring into the foyer where the good light was. Burlap also created texture in the photographs. Once I found a piece of burlap, it was time to clean up the background. This time it was done by moving myself and changing angles. Here are the details that were photographed using a small piece of burlap in the church foyer. I hope this was helpful in seeing how to create a cohesive look for your photographs during a wedding day! Thank you Chaucee for capturing the one of me shooting and for helping me stage the details! Enjoy!!!
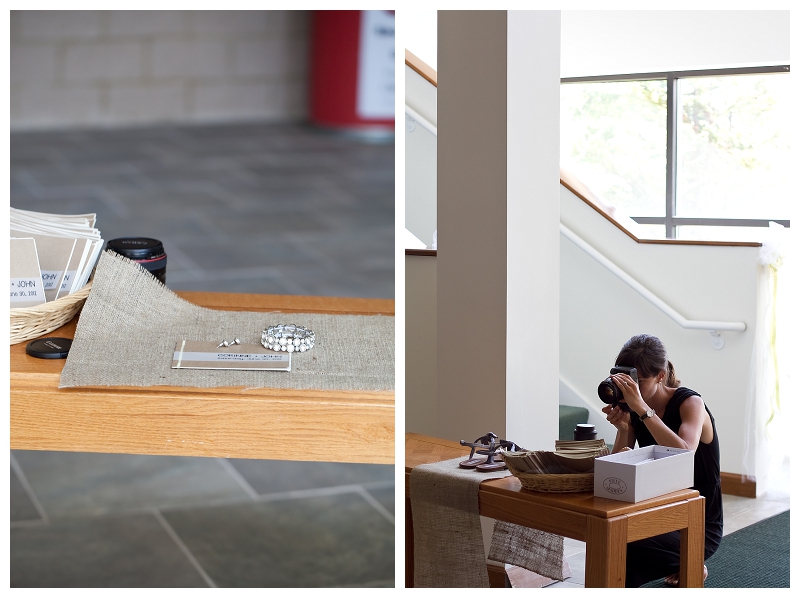 The church foyer. The tall windows were behind me.
Notice in the picture on the left notice the red color showing up.
Once I noticed this in the background I shifted my angel to eliminate the red as it was not Corrine’s wedding color.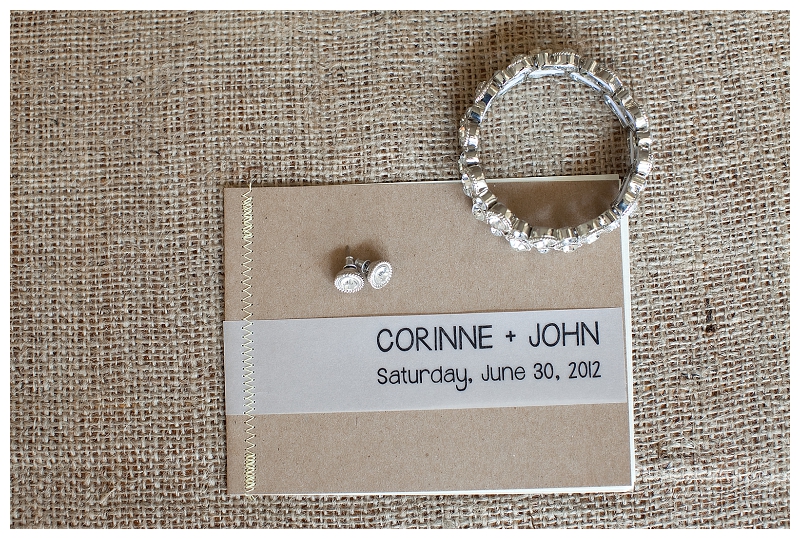 I use the Canon 100mm 2.8L for these details.
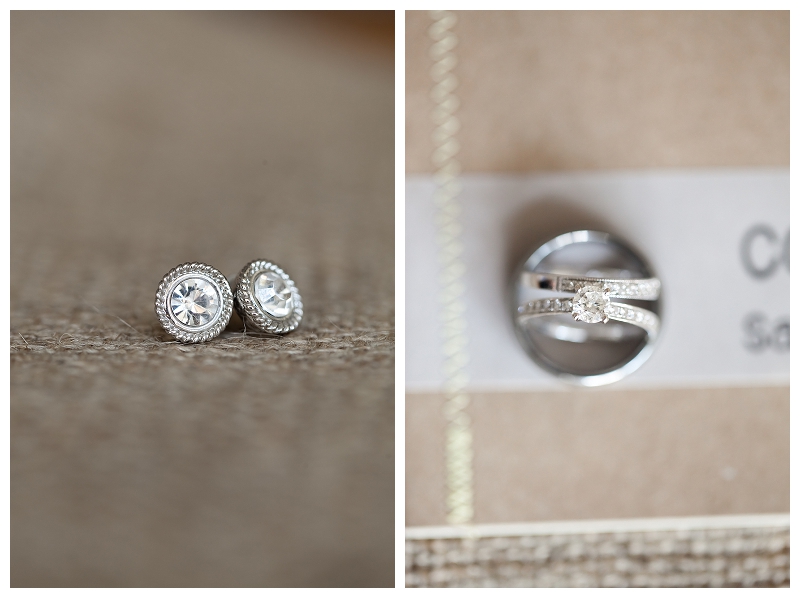
![]() I love the bottom image..clean and simple.
I love the bottom image..clean and simple.![]()