
When I started photography I had no idea what an f-stop was or what the numbers I was seeing inside my camera. Through my exploration of blogs, MeRa’s Workshop and many Saturday morning to Lee’s Camera Center I began to learn and understand the numbers I was seeing. First starting with f-stop or aperture.
The basic definition for aperture is a hole or an opening through which light travel. Ok, so light travels into my camera by the set aperture number, but this definition did not really help me. I can remember when I began to understand the f-stops when Bill at Lee’s Camera drew on a piece of paper these dots. Starting with a large circle and going all the way down to a pinpoint and then putting numbers under each dot. The dot or circle represented the opening of the lens that would allow the light into the camera. The larger the opening the smaller the aperture number was assigned. For example f1.8. The smaller the opening the larger the aperture number was; like 22.
I also learned that each lens had a different aperture range. The range could be found on the ring of the lens. I started with my Canon 40d with the zoom lens 17-55mm F/4.0-5.6. Prime or fixed lens tend to have lower aperture ranging from as low as 1.2. Where as zoom lenses f-stop tend to start at 2.8 or higher.
I best understood aperture when it was described as “How blurry of a background do I want?” The lower the aperture number, the blurrier the background will be. The blurry background that is out of focus is referred to as bokeh. The lower the aperture the smaller depth of field you will have when shooting. The higher the aperture number the more detail the background of the image will hold. You will have a greater depth of field which captures all the details within your frame.
Here are some examples of the different aperture setting I have used. Over time I have found myself in love with prime lenses, especially my 50mm 1.2. I also tend to find myself shooting at the aperture 2.0. This developed over time and much practice to discover what aperture I liked to shoot. Take your time, practice and see what aperture you like your images at. You find that spot you love! If you have any questions, please ask and leave the questions in the comment section below. Hope this is helpful.
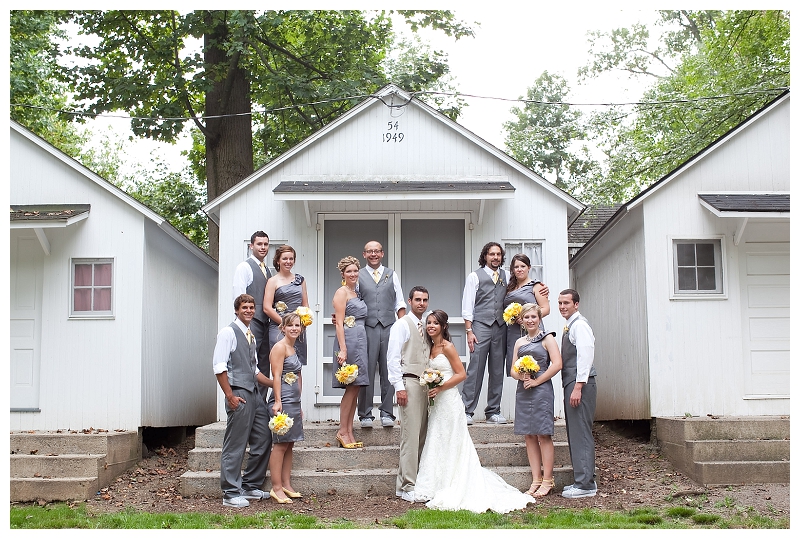
50mm 5.0 (f-stop) 1/100 iso 250
(I increased the aperture to 5.0 to ensure that bridal party on the back row would also be in focus)
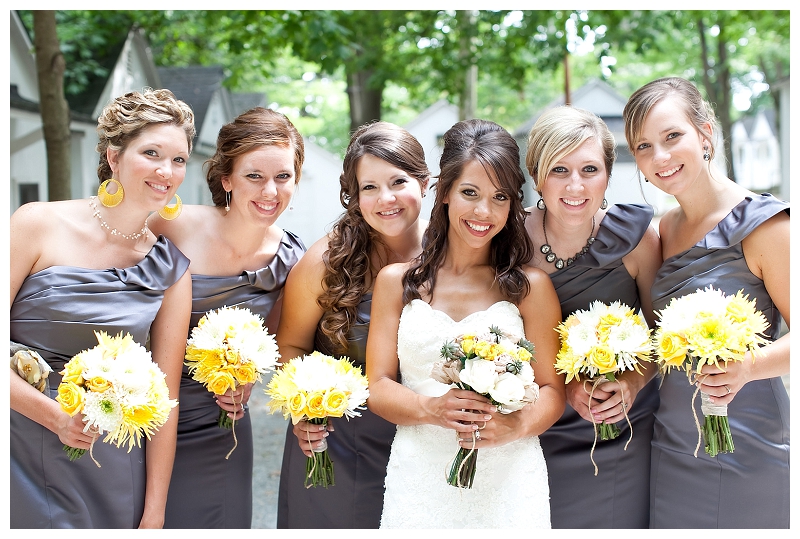
50mm 3.5 1/125 iso 200
(Not everyone was on the same plane so I kept my aperture at 3.5 allowing for everyone to be in focus)
both shot with 50mm at 1.8 1/800 iso 400
![]()
35mm 4.5 1/250 iso 250
When shooting groups my aperture range is from 3.2-4.5.
![]()
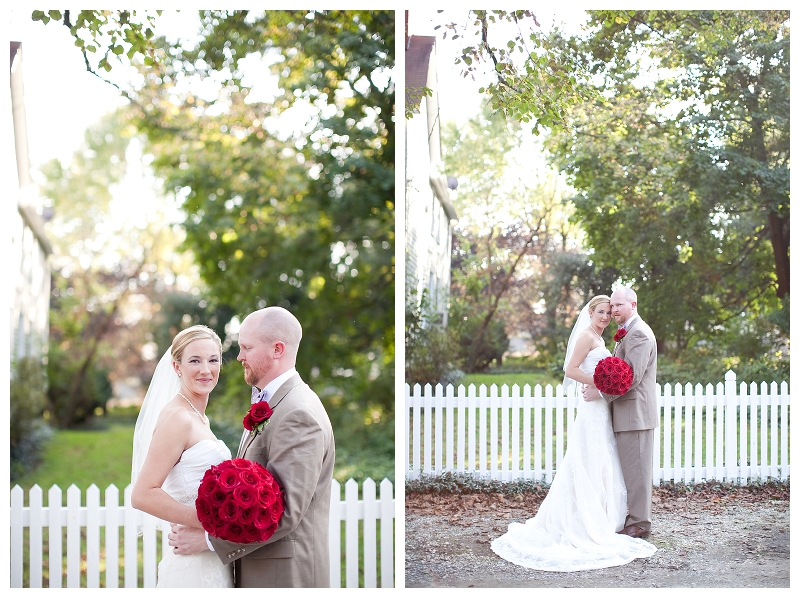
left:50mm 2.8 1/250 iso 250
right: 135mm 3.2 1/640 iso 400
(I shot this one with an increased aperture as bride and groom were not on the same shooting plane)
![]() Both taken 50mm 2.0 1/1000 iso 400
Both taken 50mm 2.0 1/1000 iso 400
(Notice how the background changes as I move closer to my subject)
![]() Above and below both taken at 85mm 1.2 1/4000 iso 400
Above and below both taken at 85mm 1.2 1/4000 iso 400
(I do not shoot wide open often, meaning the lowest possible aperture your lens allow;
however when I do I love the images it produces)
![]()
![]()
26mm f-22 .8sec iso 400 (I use my tripod for interior shots of overall room and when the aperture is big, like 22)
More on this home later this week…
![]()
on the left: 85mm 4.0 1/60 iso 400
on the right: 85mm 2.0 1/60 iso 400
Great post, Jamie! I started learning about aperture over a year ago and though I have learned so much… there’s always more to learn! At first I was in the “I have to shoot everything wide open!” excitement stage, but there are definitely times (as I’ve learned through error) when it’s wise to switch it up in order to get the best results!